
If you cannot see the Aurora Borealis in your part of the world, photographing the night sky can still be a wondrous task! For a typical photographer, most projects don’t start after sunset. But if you’re seeking that creative and innovative moonlit image, then it’s time to pack up your gear bag and head out into the twilight. A whole new array of beautiful images await you under the stars–from the captivating glow of a full moon, the peaceful energy of a metropolitan cityscape from afar, or the dazzling vibrant array of colors that make up our starry sky. Composing these images takes just a few steps, and plenty of patience and persistence, to create the perfect after dusk photograph.

Nighttime Photography Tips:
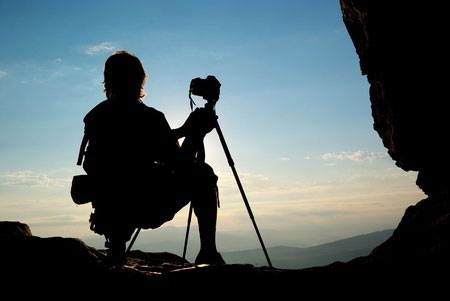
Photography with a digital SLR in low light situations means you’ll need to give your camera more time to absorb the minimal available light. To accomplish this, the camera will demand slower shutter speeds. But a slow shutter setting makes the image vulnerable to camera shake — which drastically reduces the sharpness of your image. To combat camera shake, a firmly placed tripod is an essential element of your evening photography kit. Also try hanging your gear bag on the tripod from a central location to add weight and improve overall stability. It’s also important to avoid touching the tripod or camera when the shutter is released. A remote or built in timer can come in handy for added image sharpness.
With the camera perched securely upon the tripod, it’s time to dial in four of the most important settings. First, be sure to shoot in RAW format. This file format will give you the flexibility to make white balance and exposure adjustments during post-processing with software such as Photoshop or Lightroom. Secondly, use an ISO setting between 800-1600. ISO is the equivalent to the speed of traditional film, and indicates its sensitivity to light. But be aware that the higher the ISO value the more noise, or graininess, that will appear in your image.
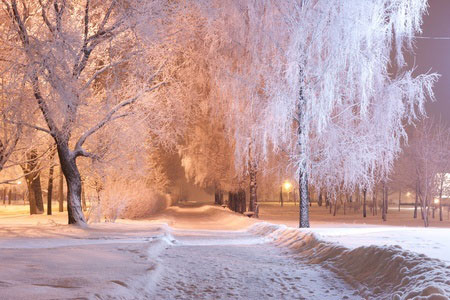
Next, put your camera into full manual mode to get the most control of your lens aperture (how wide it is open) and shutter speed (how long it is open). This setting is identified by an “M” on most major brand camera mode dials. Although the particular manual settings will depend on the amount of light available in your scene, it is safe to begin with a lens aperture of f/9 and a shutter speed of 15 seconds. Snap a shot and review the histogram of the image. If the histogram is skewed towards the left, the image is underexposed and shutter time should be increased, if skewed far to the right, the image is overexposed and shutter time should be decreased. Typically, a full moon or a fresh coating of winter snow will produce more reflective light, and thus require less shutter time.
Lastly, night time photography works best when using manual focus since your camera’s auto focus will have a hard time to lock onto objects that it just cannot see. Most lenses have what is called the ‘infinity focus’ (depicted with the traditional infinity symbol). Use the infinity setting when your lens is switched into manual focus mode and watch how it works wonders for shooting far off stars.
So get out there and enjoy your new found playground of night photography! Not only will you capture beautiful photographs, but by learning to use the manual settings on your camera you’ll learn to maximize its features for professional looking portraits taken any time of the day.

More about night photography: Top 5 Places to Photograph the Aurora Borealis
Photo Credits – 123rf.com:
Panorama view of Bangkok city scape at nighttime
Copyright: Anuwat Ratsamerat
Digital Camera: Copyright : Stefano Garau
Photographer at night: Copyright: Igor Goncharenko
Snow at Night – Copyright : Mikhail Klushneu
Milky Way over Forest – Copyright : Abd Halim Hadi